

Best way to Install OPNsense Firewall on Linux
In the ever-evolving landscape of network security, OpnSense has emerged as a formidable firewall solution. Born from a desire for innovation and enhanced functionality, OpnSense has rapidly garnered recognition for its robust features and user-friendly interface. This article will delve into the straightforward installation process and guide you through the essential initial configuration steps to unlock the full potential of your OpnSense firewall.
Rooted in the robust FreeBSD operating system, OpnSense stands as a versatile open-source firewall, readily available for installation on your hardware or as pre-configured appliances from Decisio.
OpnSense’s modest system requirements make it remarkably adaptable, allowing even an older home computer to transform into a capable firewall. At a minimum, a 500 Mhz CPU, 1 GB of RAM, 4 GB of storage, and two network interface cards suffice.
However, for an optimal experience and to unlock OpnSense’s full potential, consider a 1GHz CPU, 1 GB of RAM, 4GB of storage, and two or more PCI-e network interface cards. This configuration ensures smoother operation, especially when leveraging advanced features such as Suricata, ClamAV, or VPN services.
Installing OpnSense: A Seamless Process with Key Considerations
Setting up your OpnSense firewall is straightforward, regardless of your chosen hardware. However, it’s crucial to carefully plan and determine the specific roles of your network interface ports (LAN, WAN, Wireless, etc.) to ensure smooth operation.
During installation, you’ll be prompted to configure your LAN and WAN interfaces. To streamline this process, it’s recommended to connect only the WAN interface initially. Once OpnSense is configured, you can then safely plug in the LAN interface to finalize the installation. This approach ensures a focused configuration process and minimizes potential conflicts.
Acquiring and Preparing Your OpnSense Arsenal
Embarking on your OpnSense journey begins with obtaining the software. While various options exist, we’ll focus on the ‘OPNsense-18.7-OpenSSL-dvd-amd64.iso.bz2‘ file for this guide.
To download it, utilize the following command:
$ wget -c http://mirrors.nycbug.org/pub/opnsense/releases/mirror/OPNsense-18.7-OpenSSL-dvd-amd64.iso.bz2
Once downloaded, decompress the file using the ‘bunzip2’ tool:
$ bunzip2 OPNsense-18.7-OpenSSL-dvd-amd64.iso.bz2
Now, you have two paths: burn the ISO to a CD or create a bootable USB drive. For the latter, we’ll leverage the ‘dd’ tool, a staple in most ( Linux VPS Server Pricing )distributions.
First, identify your USB drive’s name using ‘lsblk’:
$ lsblk
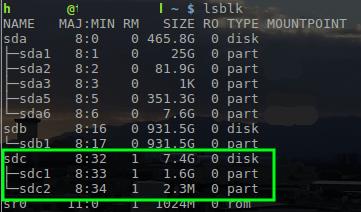
Once you’ve found it (e.g., ‘/dev/sdc’), write the OpnSense ISO to the drive:
$ sudo dd if=~/Downloads/OPNsense-18.7-OpenSSL-dvd-amd64.iso of=/dev/sdc
Remember, this command requires root privileges (use ‘sudo’) and will erase all existing data on the USB drive. Ensure you’ve backed up any necessary files beforehand.
Igniting OpnSense: From Media to Machine
With your USB drive primed and ready, insert it into the computer destined to become your OpnSense firewall. Power on the machine, ensuring it boots from the USB. You’ll be greeted by the OpnSense boot menu – a gateway to your secure network.

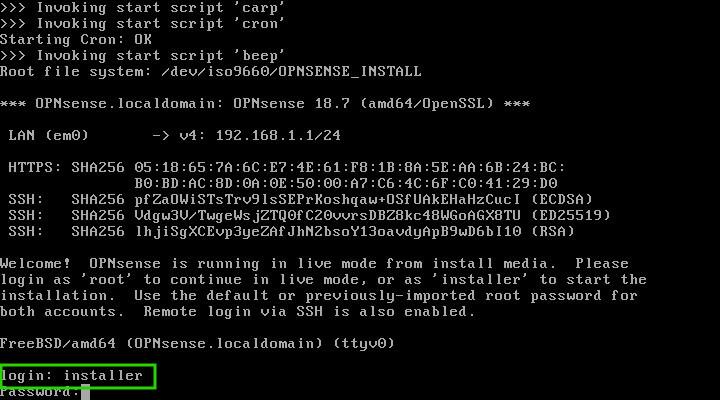
A simple press of the ‘Enter’ key propels you into OpnSense’s live environment. However, our goal is to install OpnSense onto the local storage. To achieve this, a dedicated user awaits your command.
As the system boots and presents the login prompt, enter the username ‘installer’ and the password ‘opnsense’. This grants you access to the installation wizard, where you’ll shape the foundation of your robust firewall.
Initiating OpnSense Transformation: A Word of Caution
Once logged in, the OpnSense installation wizard takes center stage. Be warned: proceeding from here will permanently erase all data on the target hard drive. Tread carefully, or exit the installer if you have any doubts.
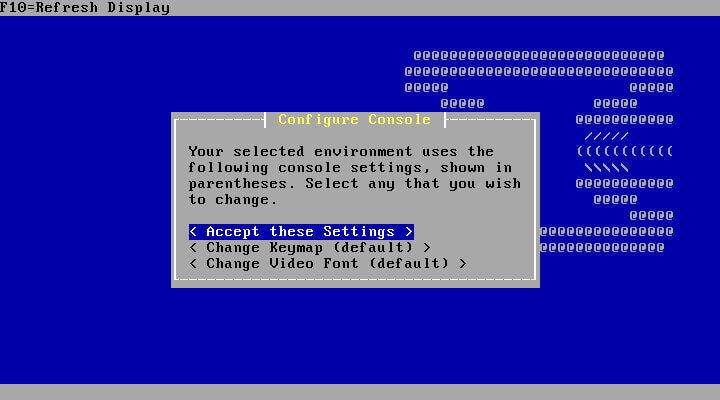
Ready to transform your machine into a security powerhouse? Press ‘Enter’ to initiate the installation process. The first step involves selecting your keyboard layout (keymap). The installer typically detects the correct one, but review and adjusts it as needed.
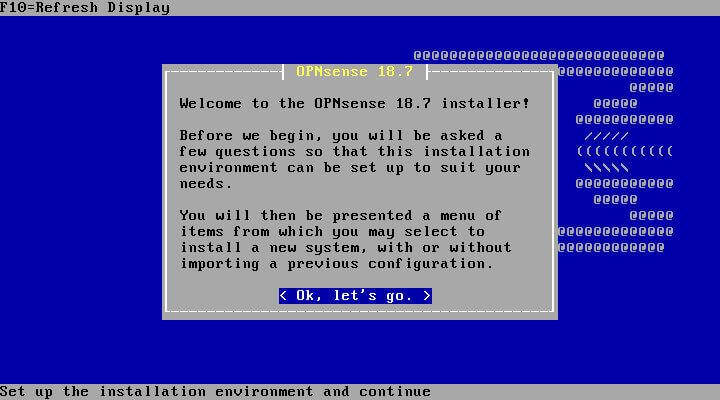
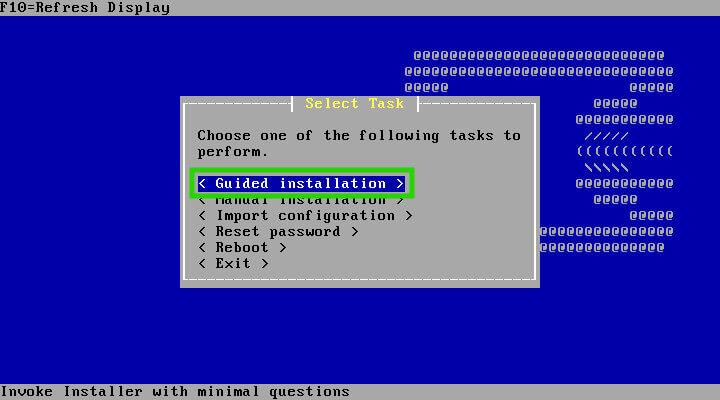
Next, you’ll be presented with various installation options. Advanced users can customize partitioning or import configurations from other OpnSense systems. For a fresh installation, simply choose the ‘Guided Installation’ option and let the wizard handle the rest.
The installation wizard now presents you with a choice: embark on a guided journey or delve into advanced customization. If you’re a seasoned user with specific partitioning needs or wish to import a configuration from another OpnSense instance, this is your moment.
However, for most, the “Guided Installation” option is the smoothest route to a fresh OpnSense setup. Opting for this path, the wizard takes charge, streamlining the process and ensuring a seamless experience.
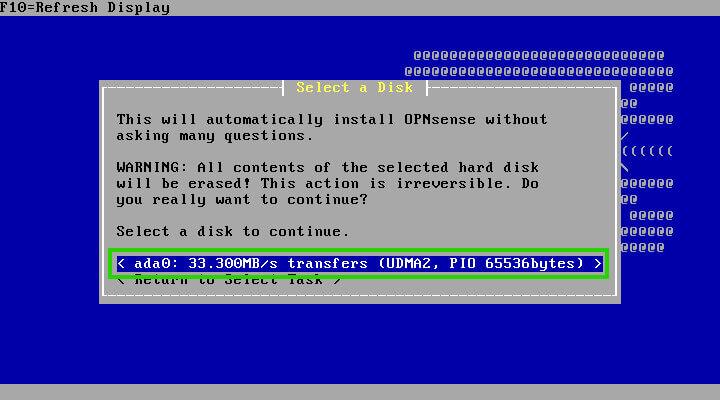
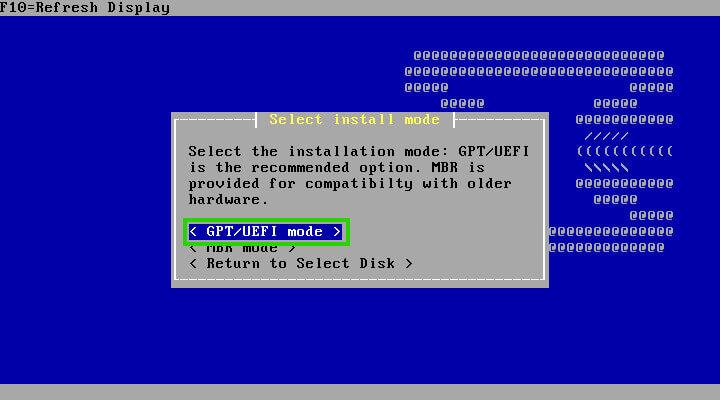
Next, the installer will display the available storage devices for your OpnSense playground. Once you’ve selected your desired device, the final decision lies in the partitioning scheme: MBR or GPT/EFI.
Modern systems generally favour GPT/EFI, but older hardware might require MBR. To determine your system’s compatibility, consult your BIOS settings for EFI/GPT support.
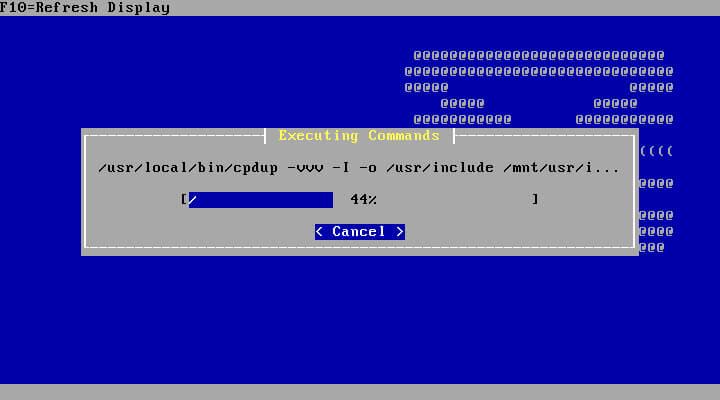
With the partitioning scheme decided, the installer takes the reins, embarking on the transformation of your chosen storage device. This process is relatively swift, periodically pausing to request essential information, such as the root user password—the key to your OpnSense kingdom.
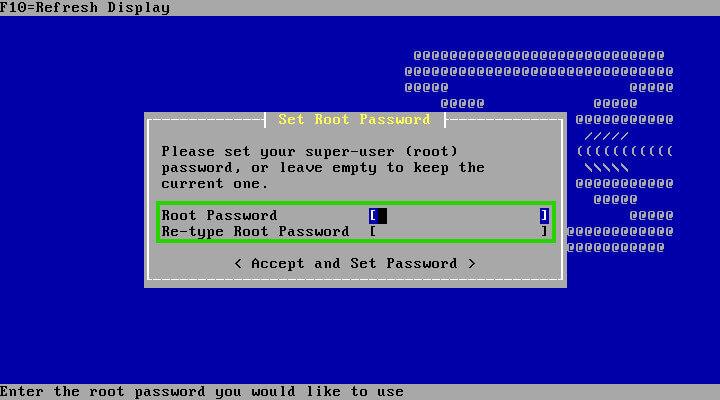
With the root password set, the installation reaches its climax. A system restart is required to apply the changes and prepare your OpnSense firewall for its first configuration. As the machine reboots, ensure the installation media is removed, allowing OpnSense to take the reins.
Upon restart, the familiar console login prompt appears, patiently awaiting your credentials. Did you notice during installation that the interfaces could have been pre-configured? No worries, we’ll tackle that now.

After logging in as the root user, you’ll observe that OpnSense has claimed one network interface card (NIC), aptly named “LAN (em0).” By default, it resides on the “192.168.1.1/24” network. But where’s the WAN interface?
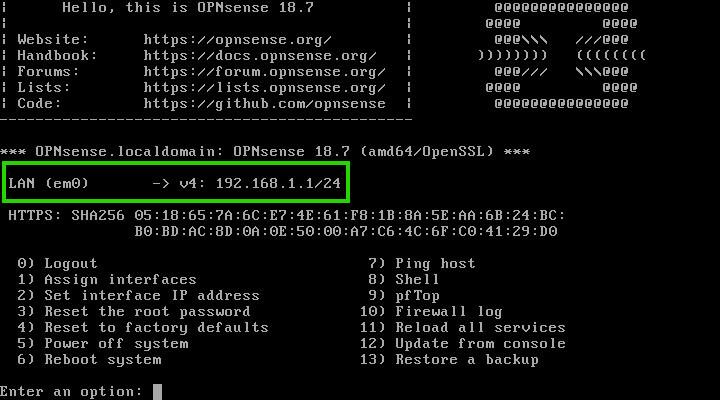
Fear not, for it’s easily summoned. Simply type ‘1’ and press Enter to reassign the NICs. Behold! Two interfaces now emerge: ’em0′ and ’em1,’ ready to be moulded into your network’s guardians.
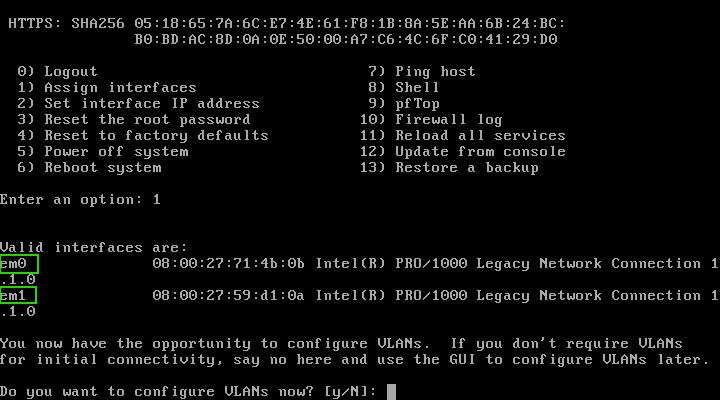
The configuration wizard empowers you to create intricate setups with VLANs, but for now, let’s focus on a basic two-network scenario: a WAN (ISP) side and a LAN side.
Type ‘N’ to skip the VLAN configuration for now. In this setup, we’ll assign ’em0′ as the WAN interface and ’em1′ as the LAN interface.
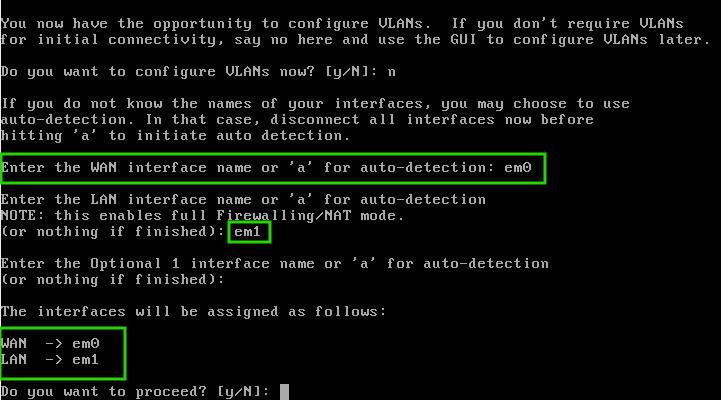
Confirm this arrangement by typing ‘Y’ when prompted. OpnSense will then reload its services to reflect these changes, ensuring a seamless transition.
With this step complete, connect a computer to the LAN interface. OpnSense’s built-in DHCP server will provide the necessary addressing information, enabling you to access the web configuration page.
Open your web browser and navigate to http://192.168.1.1 to unlock the full potential of your OpnSense firewall. From here, you can fine-tune settings, enhance security, and create a tailored network environment.
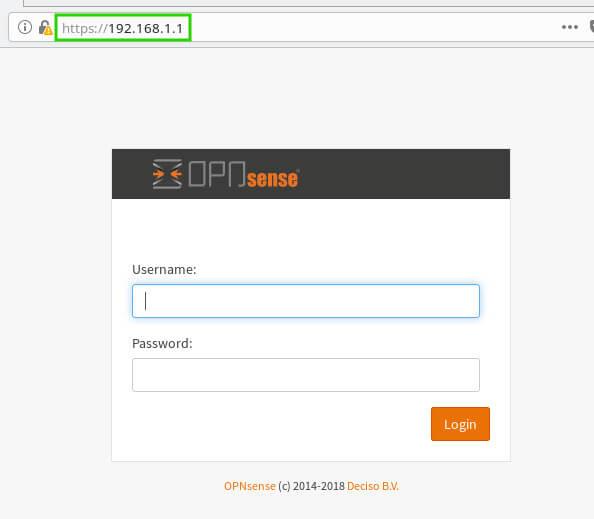
With your browser poised, enter the realm of OpnSense’s web console using the root username and the password you established during installation. This marks the final leg of your setup journey.
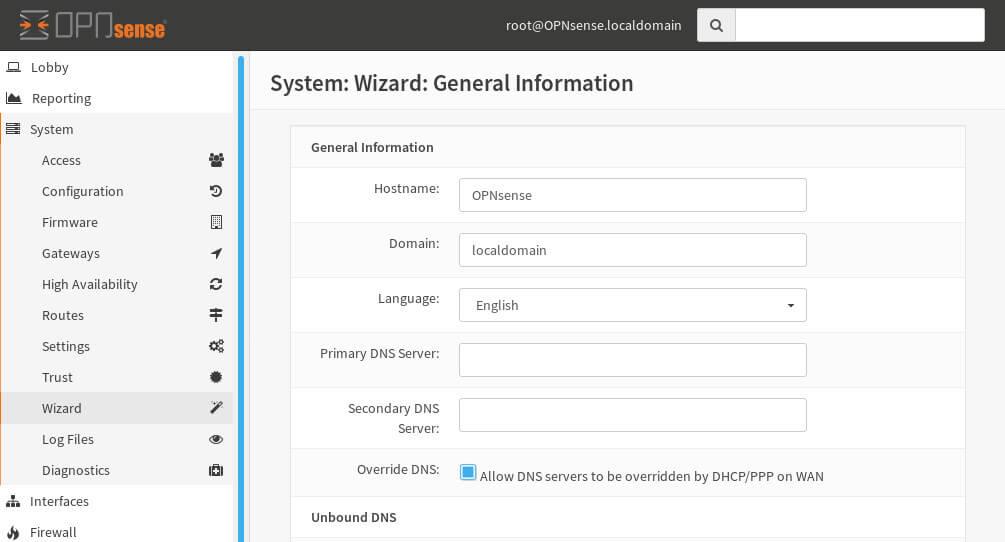
The first step is a simple information-gathering session. Provide your desired hostname, domain name, and DNS servers. For most users, leaving the “Override DNS” option selected is ideal, allowing OpnSense to fetch DNS information directly from your ISP.
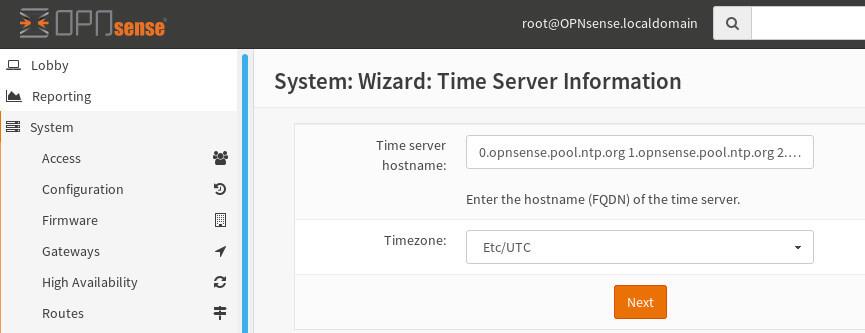
Next, the wizard will inquire about your NTP (Network Time Protocol) servers. If you don’t have your own, fear not, OpnSense offers a default set of reliable NTP server pools to keep your system’s clock accurate.
Now, let’s bridge your OpnSense firewall to the wider internet. For most home users, your ISP likely uses DHCP to assign network settings. Simply leave the “Selected Type” as ‘DHCP,’ and OpnSense will automatically retrieve the necessary WAN configuration.
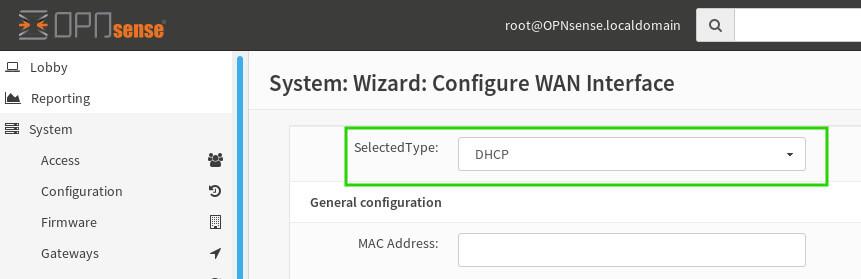
Scroll to the bottom of this screen—note the two default rules designed to block potentially harmful network ranges from entering your WAN interface. Unless you have a specific reason, it’s wise to keep these safeguards enabled.
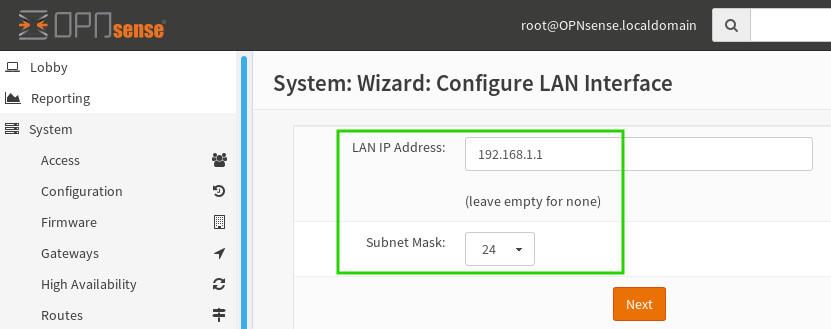
Next up is LAN configuration. While most users can stick with the defaults, remember the importance of using private IP addresses, often referred to as RFC 1918. Choosing a network range within this spectrum ensures a smooth, conflict-free experience.
The final touch in this setup symphony is an optional, but recommended, step: updating the root password. If you haven’t already crafted a robust password, now’s the perfect opportunity to fortify your security.
Once you’ve decided on the password, OpnSense will prompt you to reload the configuration settings. A simple click of the ‘Reload’ button refreshes the page and brings your changes to life.
Congratulations! OpnSense now welcomes you to its realm of network mastery. To access the main dashboard, click ‘Dashboard’ in the upper left corner of your browser window.
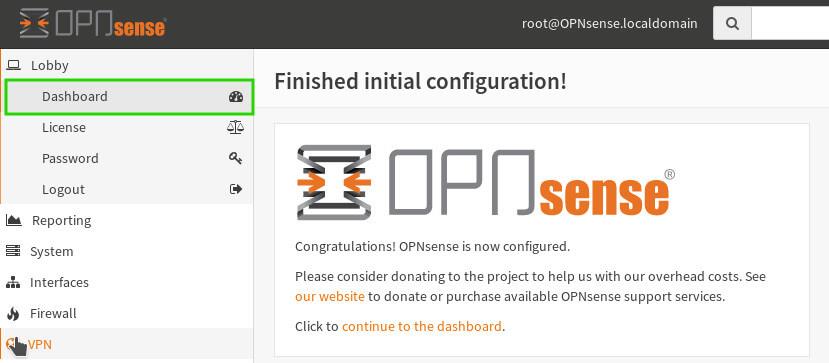
Here, you’ll find a wealth of possibilities. Install plugins, customize settings, and unlock the full potential of your OpnSense firewall. As a parting tip, it’s wise to check for and install any available updates. Simply click the ‘Click to Check for Updates’ button on the dashboard to keep your system running at peak performance.
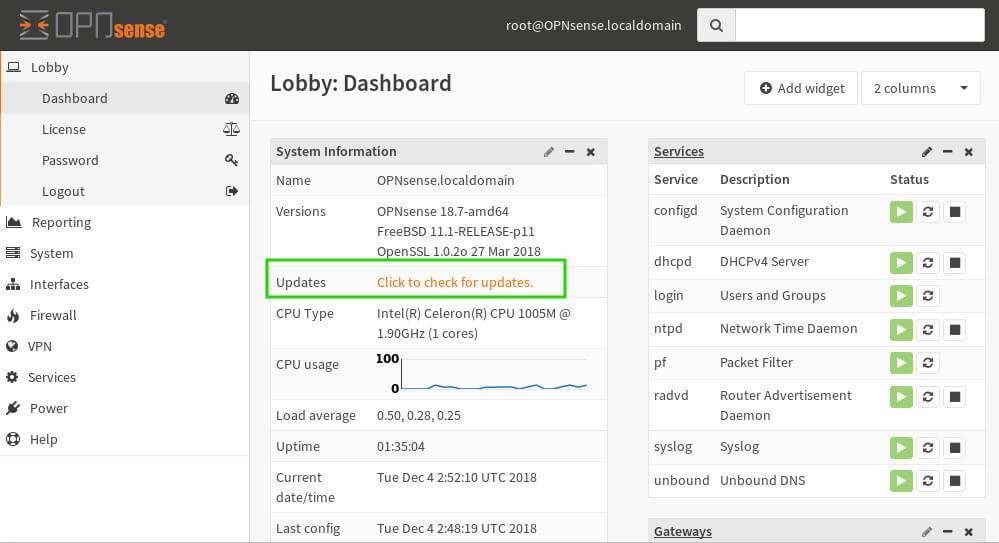
The final act in this initial configuration symphony is ensuring your OpnSense firewall is up-to-date. The “Check for Updates” button reveals a list of available upgrades, while “Update Now” streamlines the process, seamlessly applying any enhancements or security patches.

With that, your basic OpnSense installation is complete and ready to safeguard your network. But this is just the beginning. In future articles, we’ll delve deeper into OpnSense’s advanced features, exploring link aggregation, inter-VLAN routing, and other powerful tools that elevate your network security to new heights.


