How to Get MAC Address in Windows cmd | 2024 Update for Windows 10 & 11
Ever find yourself forgetting your zip code, even though it’s crucial for deliveries and billing? Your computer’s MAC address is kind of like that—essential, but easily forgotten. A MAC address is a unique combination of numbers and letters that identifies your device on a network. While it’s not always obvious where to locate it, checking your MAC address on your computer is quite simple. In this tutorial, we’ll walk you through how to find your MAC address on both Windows 10 and Windows 11. You’ll learn how to do it using the command prompt (get MAC address cmd) as well as through the Windows Settings menu. And if you’re looking for a shortcut, we’ve even got a little trick at the end to bypass all the steps. If you’re short on time, feel free to skip the “Overview” and dive straight into the instructions!
Understanding Your MAC Address
A Media Access Control (MAC) address serves as a unique identifier for your device on networks like WiFi, Ethernet, and Bluetooth. This address is typically linked to your device’s Network Interface Controller, which is the hardware that connects you to the Internet. While MAC addresses share similarities with IP addresses as both help identify devices on a network, there’s a key difference: your MAC address is set by the device’s manufacturer and remains constant, no matter which WiFi network you’re on. This makes it more secure, as it’s much harder for others to access or change your MAC address.
In most cases, you won’t need your MAC address for day-to-day activities like browsing the web. However, there are certain situations, such as connecting to a WiFi network with MAC filtering for enhanced security, where knowing this address becomes essential. When that moment comes, don’t worry—we’ve got you covered. Below, you’ll find step-by-step guides on how to locate your MAC address on both Windows 10 and Windows 11, whether you’re using a laptop or desktop PC.
Finding Your MAC Address via Command Prompt on Windows 10
If you’re looking for a fast way to find your MAC address on Windows 10, using the Command Prompt is your best bet. Although working with command lines can seem a bit daunting at first, it’s very straightforward. The key tool here is the built-in Command Line Interface (CLI) known as Command Prompt.
Step 1: Open the Command Prompt
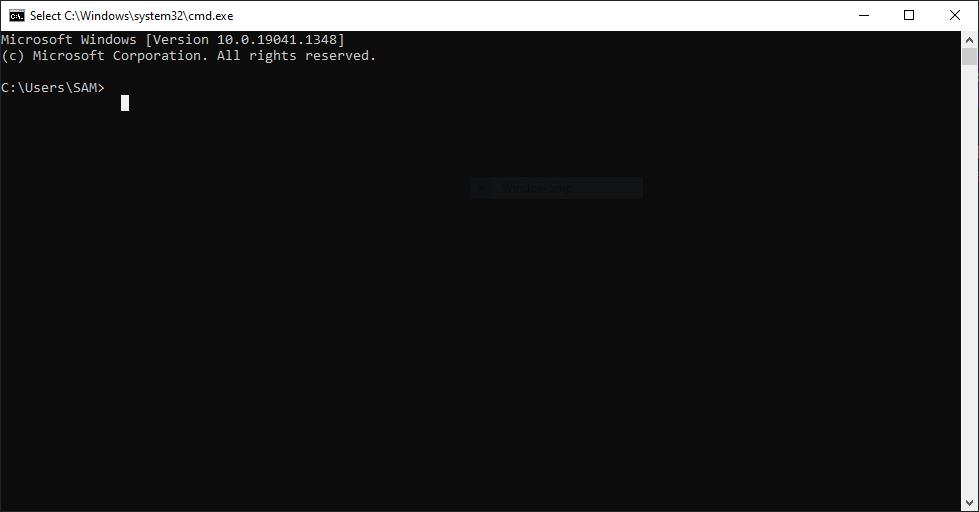
You can launch the Command Prompt through the Run dialogue or directly from the Start menu.
Option 1: Using the Run Dialog
– Press the WIN key + R to bring up the Run dialog (or search for “Run” in the Start menu).
– In the dialog box that appears, type cmd and hit <Enter>.
Option 2: Using the Start Menu
– Open the Start menu or use the search bar.
– Search for “Command Prompt” and click the first result at the top.
Once you have Command Prompt open, you’re ready to find your MAC address in just a few easy steps!
Step 2: Retrieve Your MAC Address Using IPConfig
After opening the Command Prompt, you’re ready to find your MAC address. The tool we’ll be using is called ipconfig, a command that provides details about your network setup.

To get started, type the following command into the Command Prompt window:
“`bash
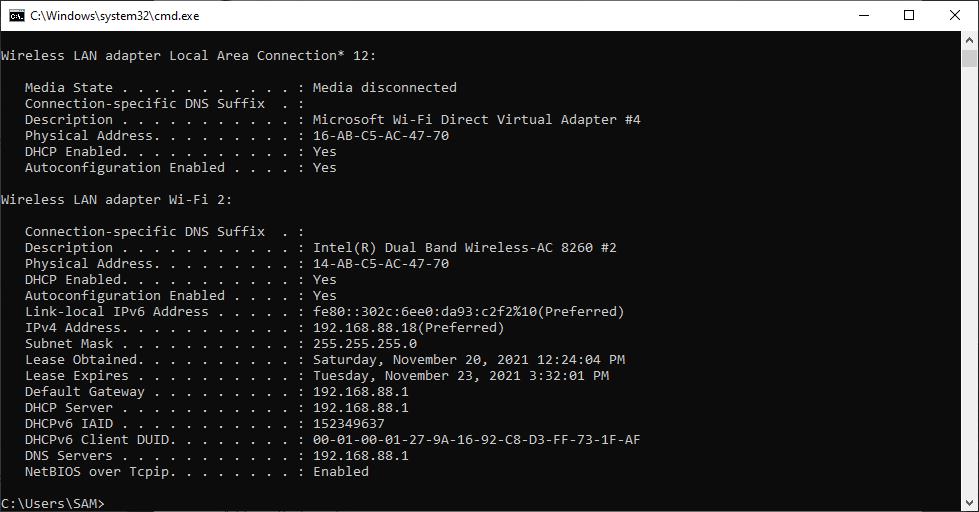
ipconfig /all
You can also copy and paste the command directly to avoid any errors. Once you run the command, a lot of detailed information about your network will appear. To locate your MAC address, look for the “Physical Address” entry. This will be a long sequence of numbers and letters—your unique MAC address.
Here’s an example of what the MAC address might look like (though yours will be different):
Physical Address: 00-1A-2B-3C-4D-5E

You can either write down this string or copy it for later use. That’s all it takes to find your MAC address using Command Prompt. Next, we’ll explore how to check it through Network Settings.
Finding Your MAC Address via Network Settings on Windows 10
If you’re more comfortable navigating through Windows’ graphical interface rather than using command lines, checking your MAC address through Network Settings might be the way to go. Though it involves a few extra clicks, it may feel more familiar for those who prefer working with the Windows GUI.
Here’s how you can do it:
- Right-click on the WiFi icon located at the bottom right corner of your taskbar.
- From the menu, select “Open Network & Internet Settings.”
- In the window that appears, you’ll see two large options: Data usage and Properties. Click on Properties.
- Scroll down to the very bottom of the Properties section, where you’ll find your Physical address (MAC).
To copy the MAC address, you can either:
– Highlight the string of numbers and letters in front of “Physical address (MAC)” by holding down your left mouse button and dragging over the text. Then, press Ctrl + C to copy.
– Alternatively, click the Copy button, but keep in mind that this will copy all the information in the Properties window, not just your MAC address. You’ll need to paste it somewhere and then select the MAC address from the pasted data.
That’s all there is to it—an easy, GUI-based method to find your MAC address!
Locating Your MAC Address on Windows 11
Although Windows 11 has a different appearance than Windows 10, finding your MAC address on Windows 11 is quite similar to the process in Windows 10. Let’s explore how to quickly find your MAC address on a laptop or PC using the getmac command.
Find Your MAC Address Using the getmac Command on Windows 11
The steps for finding the MAC address on Windows 11 are almost identical to those for Windows 10, but here we’ll focus on using the getmac command instead of ipconfig.
- Start by opening the Command Prompt. You can do this by pressing the Windows key + R on your keyboard.
- In the Run dialog box that appears, type cmd and press Enter to open the Command Prompt.
- Once the Command Prompt window is open, type the following command:
“`bash
getmac
- Press Enter, and your MAC address will appear under the section labelled Physical Address.
This method provides a quick and simple way to retrieve your MAC address on Windows 11 without much hassle!
If you prefer avoiding the command line altogether, no worries! You can easily find your MAC address through the Windows 11 Settings menu without having to use the getmac command.
Here’s how:
- Start by opening Settings by pressing the Windows key + I on your keyboard.
- In the Settings window, navigate to the Network & Internet section from the left-hand menu.
- Depending on whether you’re using a Wi-Fi or Ethernet connection, select Wi-Fi or Ethernet from the options in the Network & Internet section.
- Scroll down and click on the Hardware Properties option.
- In the Hardware properties window, locate the Physical address (MAC) field.
To copy the MAC address, simply highlight it by holding down your left mouse button and dragging over the address, then press Ctrl + C to copy it.
This method provides a user-friendly way to find your MAC address without using any command-line tools!
summary
The guide explains how to find your MAC address on Windows 10 and Windows 11, providing step-by-step instructions for both command-line and graphical methods. The MAC address is a unique identifier assigned to your device’s network hardware, similar to an IP address but constant across networks. For Windows 10, users can locate the MAC address using the Command Prompt with the “ipconfig” command or by navigating through the Network Settings menu. In Windows 11, the process is nearly identical, but the guide focuses on using the “getmac” command in Command Prompt. Additionally, for those who prefer not to use the command line, the MAC address can also be easily accessed through the system’s Network Settings, ensuring an accessible method for all users.


